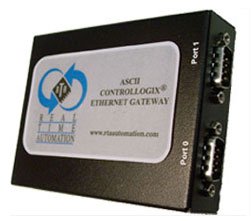
Modbus TCP Client Modbus RTU2TCP
451EM
Modbus TCP Modbus Master RTU Gateway
The Fastest Way to Move Modbus RTU Registers to a Modbus TCP Client

Ethernet is no longer an option for Industrial Devices – ETHERNET IS A REQUIREMENT. Ethernet is the fastest growing segment of Industrial Networking for one reason – The Market (Your Customers) Loves Ethernet. And one of the most important Industrial Ethernet protocols is Modbus TCP. Modbus TCP is the Ethernet solution used by many HMIs and PLCs to move automation data over Ethernet.
Even though Ethernet is the current standard for industrial communications, there are still an awful lot of Modbus RTU devices out there. There is a ton of perfectly good scales, flow meters, drives and lots of other things that use Modbus RTU messaging. This is equipment that you’ve probably used for a long time and you’re comfortable with. You know how to set it up, how to make it work and you know that it’s reliable. Plus, you can probably get it a really good price since it doesn’t have all the fancy features of the new models.
The problem is that you still have to get this stuff into your PLC or HMI over a Modbus TCP network. And a lot of the time now we don’t have serial port to use and if you do, you need to get a 232/485 converter. If you set all that up, you’ve probably thought, “Shouldn’t this be easier?”
Well, that’s what our device is for. It makes moving Modbus RTU register data to a Modbus TCP Client simple. It quickly and easily moves the registers you need from those scales, drives and other RTU devices to Modbus TCP Clients like Wonderware and other HMIs without all the hassle. Here’s how you do it:
- Start the web server and configure your first Modbus device. Enter its Modbus RTU Address and a set of registers to read and a set of registers to write. You’ll have to tell it the number of registers and their starting address.
- Repeat this for every Modbus RTU device you have.
- If you have a second or third set of registers you need from one of your devices, enter your device again and again, each time specifying a different set of registers.
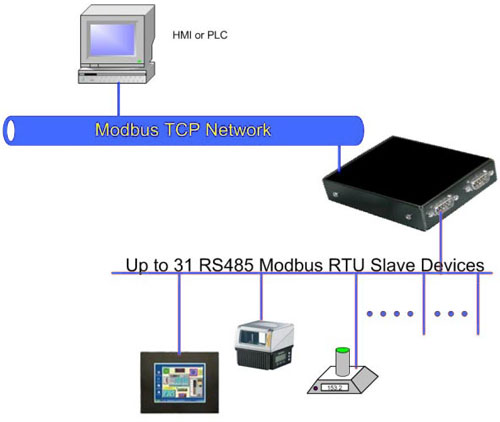
When you get done, the device starts reading all the registers you specified and storing them in the module. All those registers become immediately accessible as Modbus TCP Server data using the same register addresses as they have in the Modbus RTU Network. That means that the mapping is trivial. Register 100 in Device 2 is simply Register 100 UID (Unit ID) 2 in the Modbus TCP Server. In case, you are not familiar with UIDs, this is a standard Modbus TCP field designed specifically for this type of application. Using the UID field, you can access any register data of any Modbus RTU device just as if that device was directly on the Modbus TCP network!
It’s Easy! So Easy that we will let you try it for 45 days with a no questions asked return guarantee. You don’t like it, you don’t like the documentation, we’ll happily take it back.

Ordering Information
| 451EM | Modbus TCP Server Modbus RTU Gateway | Desk Mounted Gateway |
| 451EM-P | Modbus TCP Server Modbus RTU Gateway | Panel Mounted Gateway |
| 451EM-D | Modbus TCP Server Modbus RTU Gateway | Din Rail Mounted Gateway |
- Up to 31 RS485 Modbus RTU Slave Devices
- Access Any Modbus RTU Slave from any Modbus TCP Client
- Immediately Access Any Configured Holding Register
- Pass Thru Access To Any Other Holding Register
- Read/Write Access to Modbus RTU Holding Registers
- Monitor Modbus RTU Network Status from the Web Server
- Simple, easy-to-use Web Server Configuration Using Any Browser
- Up to 31 RS485 Modbus RTU Slave Devices
- Access Any Modbus RTU Slave from any Modbus TCP Client
- Immediately Access Any Configured Holding Register
- Pass Thru Access To Any Other Holding Register
- Read/Write Access to Modbus RTU Holding Registers
- Monitor Modbus RTU Network Status from the Web Server
- Simple, easy-to-use Web Server Configuration Using Any Browser Configuration
